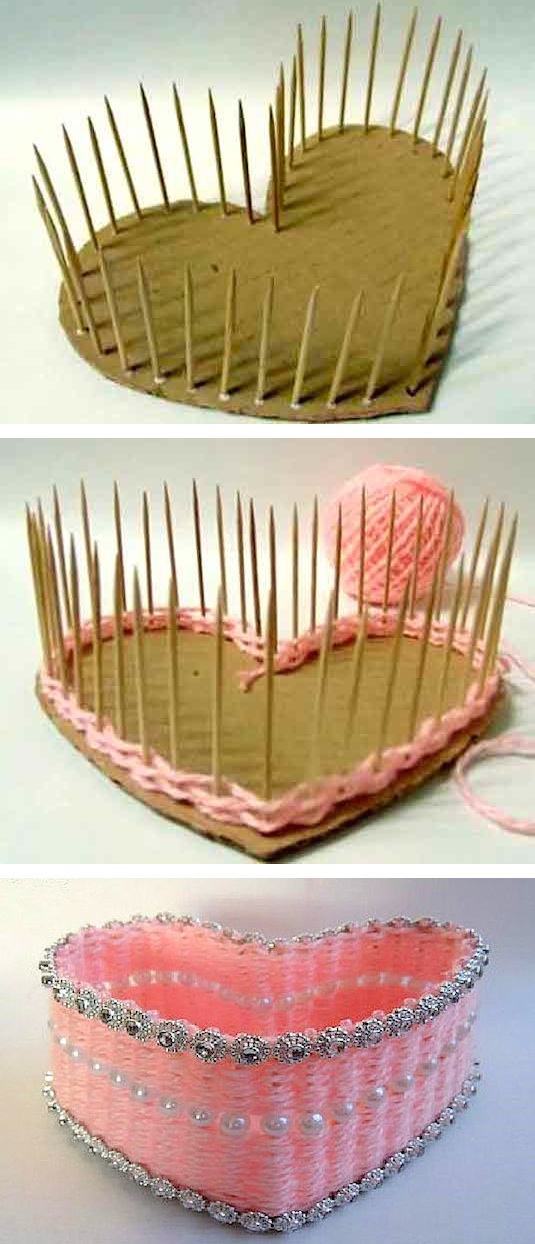
The picture itself is pretty explanatory, but here are the simple instructions:
First you will need to determine what size you want your heart to be, and then cut it out using thick cardboard (you can print off a perfectly shaped heart online to use as your template). While you’re doing this, cut a piece of felt in the shape of your cardboard cut-out that is about a 1/4 inch smaller.
Personally, I would lay the felt down first, before attaching the toothpicks (not shown this way in the photo). This will eventually be the bottom of the inside of your basket, and I think you will get a cleaner look this way. Choose a felt color that coordinates with your yarn, and use a thin layer of glue to attach it to the cardboard.
Next attach toothpicks along the outer edge by inserting them into the cardboard, and then securing them with hot glue about every 1/2 inch.
Determine your starting point, and then tie a ball of yarn to one of the toothpicks– now get to weaving! Weave the yarn in and out of the toothpicks, pushing it down every once in a while so that you have a thick, secure wall of yarn.
Once you come to the end, cut the yarn and secure it with a dab of hot glue.
Use ribbon or other embellishments to trim the edges. The basket shown in the picture had pearl beads placed on the toothpicks half way through weaving, which I think looks really nice!
P.S. You can do this in any shape!
from Blogger http://day-diy.blogspot.com/2016/08/heart-shaped-basket.html
